1940 Piper J-3 Cub
On 24 January 2010 John purchased a Piper Cub project that could best be described as a "Basket Case".


The project consisted of a fuselage that was not much more than a 'pattern' for John to follow as he replaced more sections of tubing than he would be able to salvage ... a set of wings that would need new spars and several new ribs ... and the wing struts.
John knew when he purchased the project that it would be another 'ground -up' restoration in order to make the airplane airworthy.
He begins with a detailed inspection of the fuselage tubing ... making appropriate repairs where they are needed and replacing the tubing that is beyond repair.


Then he painted the entire fuselage with primer ...
... and attached the new wooden stringers where they are needed on the fuselage.


John restored the original instrument panel ... installed the control sticks ... the seat frame ... and made a new canvas stow bin ... located behind the rear seat.
He collected replacement instruments for the newly restored instrument panel ...


... cut out a new set of floorboards ...
... and installed the tail wheel on the fuselage.


In just under a month, on a dry, sunny day, John moved the Cub outside. With the new floorboards installed ...

... he installed the fabric on the interior of the fuselage.

The next day he was able to apply the silver on the fabric he installed.
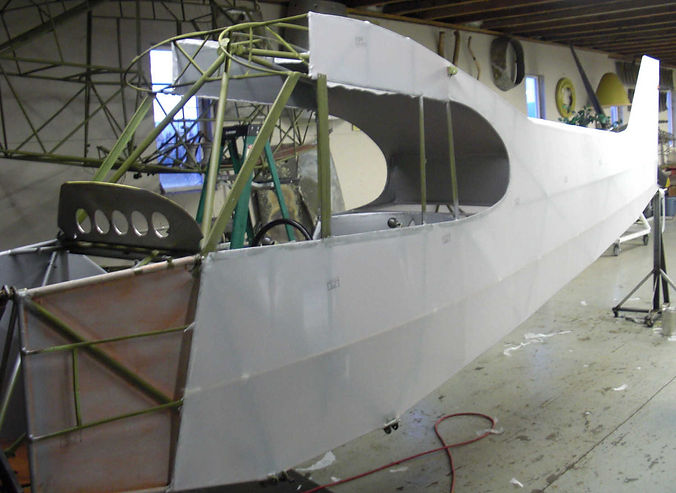
By mid- March 2010, John had covered the exterior of the aircraft with fabric.
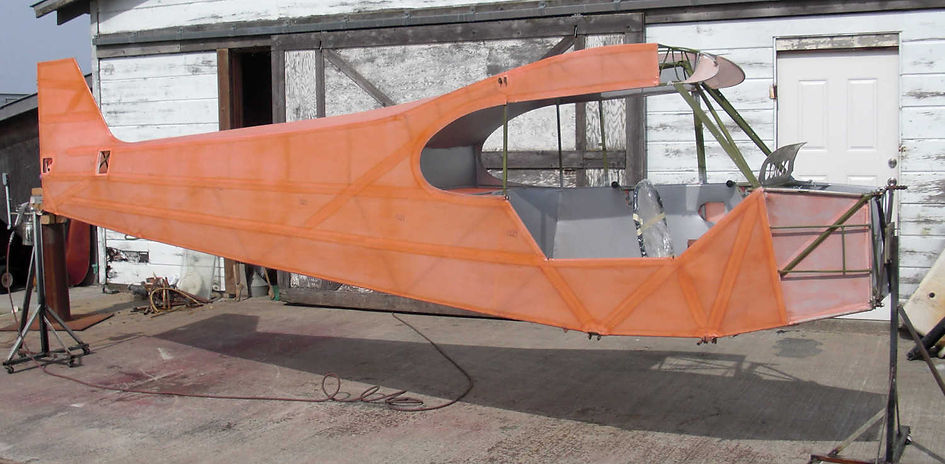
One week later the weather was kind enough so that John was able to dope the fabric ...

... and later that same day, he was able to paint the silver on it.


In May, John was able to get the interior painted that classic "Cub Yellow" that we all recognize.
The instrument panel was painted black and replacement instruments were installed ...

... and John was able to paint the exterior of the aircraft that same classic "Cub Yellow".

No cub would be complete when painted the classic "Cub Yellow" until it gets the black "Thunderbolt" ...
... or the Cub decal on the tail!


John had to stop working on the cub for nearly a year while he turned his attention to other things that he needed to take care of, but by February 2011, the little Cub had a new engine in place.
John purchased a new windshield for the cub, and here you can see it just sitting in place for the moment.


Later in the year John ordered the lumber he needed to make the new wing spars for the Cub.

That winter the Cub was in good company tucked away in the shop with John's "Rat Rod" and the Hawker Hurricane AM274.

In March 2012 we were contacted by the agent of a gentleman in China who wanted to purchase this little Cub.
After several emails back and forth, making sure we were all understanding one another correctly, and a few additional phone calls; John sold the Cub and prepared her for shipping.

On 20 April 2012, John removed the engine from the Cub in preparation for shipping it. We then loaded the cub and all the remaining parts that went with the project into a shipping container to begin its journey to its new owner!
Knowing that the Cub was going to a new home, John made the decision he would begin the project he had always WANTED to build. Using the proceeds from the sale of the Cub he ordered the tubing he would need to build the definitive reproduction Spirit of St. Louis!